Creamy Pot Pie Soup

**To Pin this recipe for later use the “Pin it” button at the end of the instruction section**

Subscribe to our YouTube channel and follow us on social media!! 

 https://www.youtube.com/channel/UCvWq9EZRYx6MB6ty5m44c5w                                      

Hi friends!!!  It’s been a while since we have posted on here.  Here is an update 🙂  If you follow me on Facebook you know we are expecting our third child.  I’m now 29.5 weeks along!!!  Here is the current view of my toes LOL

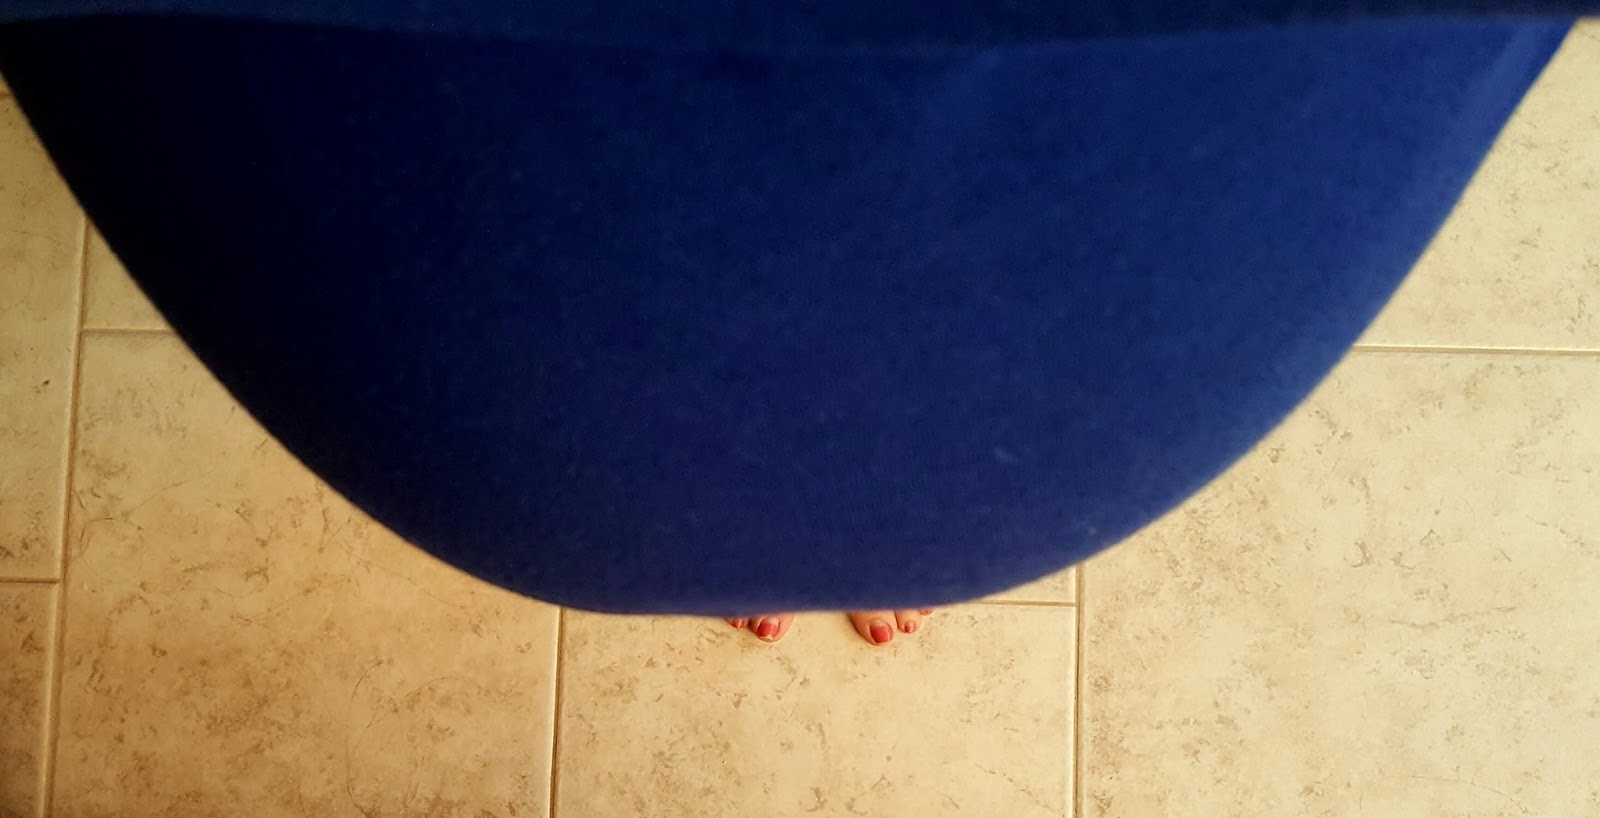
Thank you for all the well wishes, support and love throughout this pregnancy!!!

Now on to the yummies!!

This week we got to enjoy a farm raised rabbit for our dinners.  I can compare the flavor to the best chicken you’ve ever had.  Its moist tender meat that has amazing flavor, its naturally lean and easy to find without hormones and grass fed.

It was so much food that we were able to spread it out to feed our growing family of 4 (soon to be 5!!) for THREE nights.  **see below for photos of the two other meals and links to recipes**

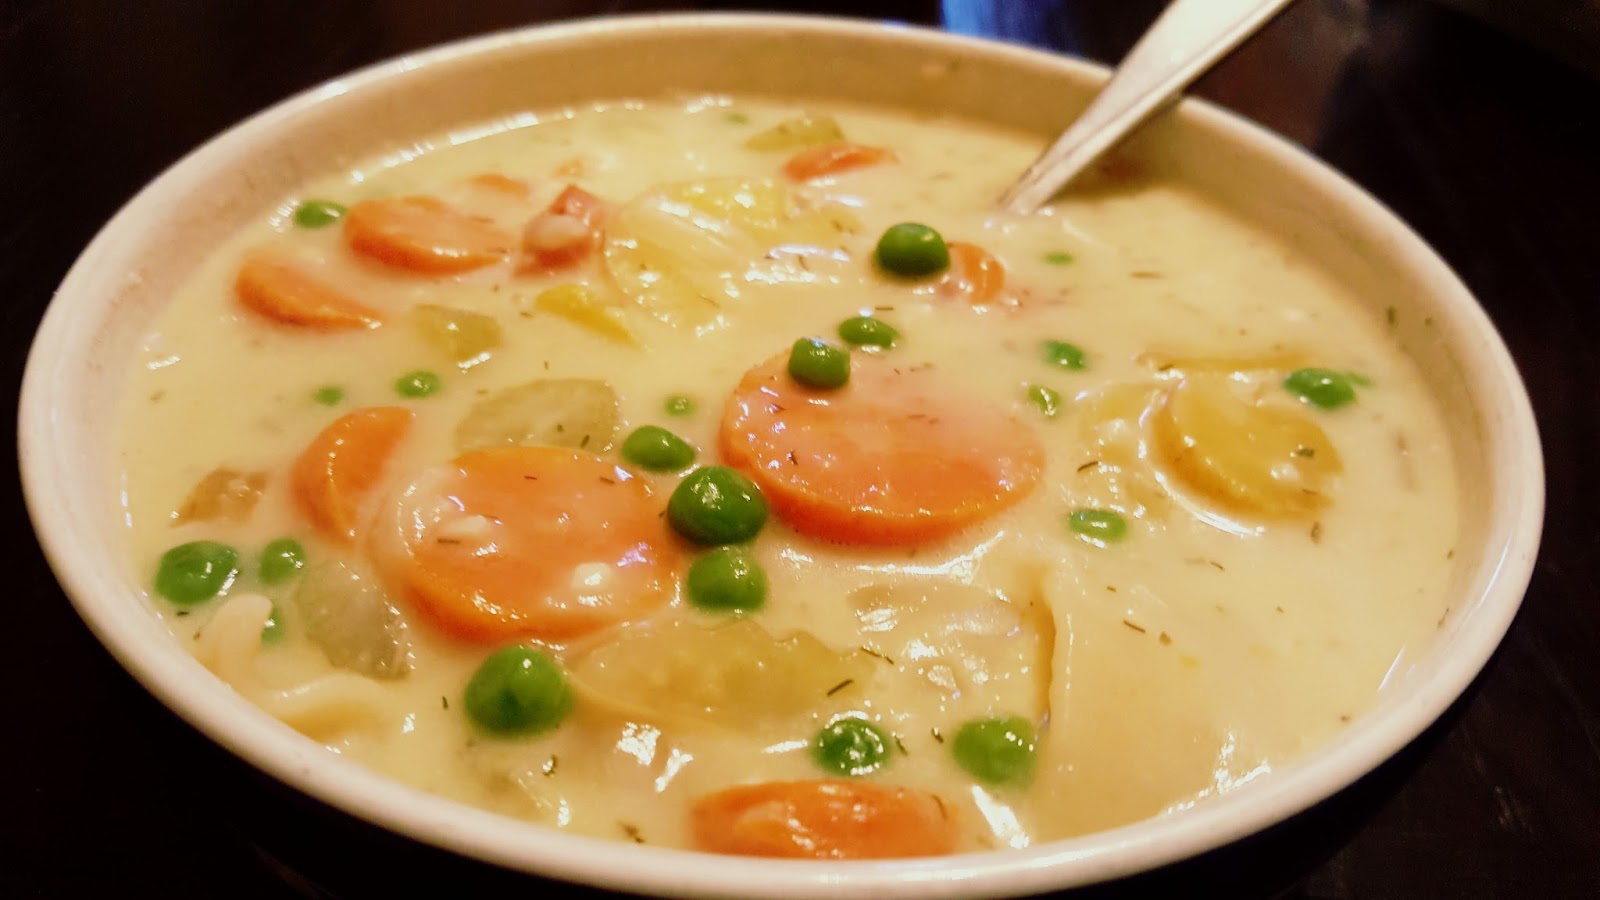
Here is the recipe for one of the dishes we used it for Creamy Pot Pie Soup.  This dish will work with Turkey, chicken or farm raised rabbit.

Ingredients:

  • 3 Tbs olive oil
  • 1 medium onion diced
  • 4 large carrots sliced into rounds
  • 3 large celery stalks diced
  • 2 large potatoes diced
  • 2 cups of white meat diced small (or cooked and shredded); turkey, chicken or farm raised rabbit will all work in this dish
  • 12oz of peas (I use frozen)
  • 4 Tbs butter
  • 4 Tbs flour
  • 4 cups broth or stock (learn how to make your own here)
  • 1 cup heavy cream 
  • Salt and pepper to taste
  • 1/2 tsp smoked paprika
  • 1 tsp garlic powder
  • 1 tsp dill 

Instructions:

  1. In a warm pot on med-high heat, saute the onion with a pinch of salt and pepper in olive oil until translucent.
  2. Add meat, carrots, celery and potatoes with another pinch of salt and pepper (we are layering in the flavors, adding a small amount of salt and pepper with every ingredient builds depth of flavor)
  3. Sprinkle in the herbs and spices and saute for about 5 min to bring the heat back up in the pot.
  4. Make a well in the middle of the pot and add the butter and flour.
  5. Whisk the butter and flour together until its well incorporated and the flour is lightly toasted (about 5min) then whisk in one cup of the broth. 
  6. When its well incorporated stir in the rest of the broth.  Bring up to a boil then cover and simmer for 40min on low (until the veggies are tender) 
  7. Increase the heat to medium, add peas and heavy cream then bring back up to a slow simmer.  Stir until the desired consistency is reached (it will thicken the longer it simmers).
  8. Taste for seasoning (Careful it’s HOT). Add salt/pepper and more dill if needed.
Enjoy!!

For more information on the first two meals from this farm raised rabbit follow the links below!


For Meal #1 we made Country fried rabbit.  I used the oven “fraked” recipe (click here for recipe) in a large cast iron pan then transferred it to the oven.


For Meal #2 Farmer J smoked the remaining meat for Smoked rabbit Taco Tuesday.  He made it with a side of guacamole (click here for his amazing guac recipe)

^^Click here to pin the Creamy Pot Pie Soup for later^^

Canning green beans the easy way!

Farmer J is always talking about his mamma’s canned green beans.  For him that flavor brings him right back to his childhood.  When we started canning we processed ours exactly how she did … I was blown away by how beautiful they were and the delicious fresh flavor!

Here is how to do it:

  1. Wash and snap your green beans.
  2. Raw pack the green beans in sanitized one quart jars.
  3. Add one teaspoon of salt to each jar.
  4. Pour boiling water over the green beans leaving one inch head space.
  5. Remove the bubbles from the jar by running a spatula or butter knife along the inside wall of the jars.
  6. Add sanitized lids and rings then tighten finger tight.
  7. Pressure can the jars 10lbs for 25min.  *adjust the weight for your altitude if needed*
  8. Use caution when removing the jars from the pressure canner as they are HOT!
  9. Allow to cool completely before labeling and store in a cool dark place.
Let us know in the comments below if you would like some of our green bean recipes!!

My mamma’s banana bread recipe

 **To Pin this recipe for later use the “Pin it” button at the end of the instruction section**

Subscribe to our YouTube channel and follow us on social media!! 
 https://www.youtube.com/channel/UCvWq9EZRYx6MB6ty5m44c5w                                      

Mom always made the BEST banana bread!  Every weekend the house smelled amazing and we couldn’t wait to dive into that delicious sweet bread.  Here is the recipe:

Ingredients:

Crumble Ingredients (optional):
  • 3 Tbs sugar
  • 2 Tbs flour
  • 1 tsp Cinnamon
  • 1 Tbs butter, softened

Instructions:

  1. Preheat oven @ 350
  2. Sift flour and add in baking powder, baking soda and salt
  3. In a separate bowl, combine sugar and butter and mix well
  4. Add eggs to sugar/butter mixture and beat until well incorporated and you get a soft texture
  5. Add yogurt, banana and vanilla to the egg/sugar/butter mixture and mix well to combine.
  6. Slowly add the flour mixture to the wet ingredients and beat well to combine.
  7. Pour entire mixture into a greased and floured loaf pan
  8. In a small bowl, mix together crumble ingredients (sugar, flour, cinnamon, and butter) until mixture becomes crumbly (I use a fork to combine)
  9. Sprinkle the crumb mix on top of the loaf
  10. Bake for 25-30 min or until you can insert a toothpick into the center and it comes out clean
  11. Let cool before slicing and enjoy ðŸ™‚
^^Click here to pin this recipe^^
*Note: I am a participant of the Amazon.com associates program.  This is an affiliate advertising program designed to provide a means for sites to earn advertising fees by advertising and linking to amazon.com.  I have personally purchased or researched all of the products linked and will not suggest a product otherwise.  By purchasing through these links you support this Mini Slice of Farm blog without any extra cost to you and allow us to continue posting great content for you.  Thank you for your support!!

The secret to CRISPY Oven Baked Fries

One afternoon I had an hour to prep dinner early.  We were having salad, burgers and fries.  I started by prepping the salad and since the cutting board was already out I decided to cut up the potatoes into fries.  I put them in cold water so they don’t turn brown.  When it was time for dinner I pulled out the fries, gave them a good rinse, tossed them in olive oil and seasonings then put them in the oven.  The result was a crispy french fry that was packed full of flavor!  I have modified this technique and recipe a bit over the years since then to get the PERFECT flavorful crispy french fry.  Here is the recipe:

Ingredients:
  • 4 Large russet potatoes 
  • 4-6 Tbs of avocado oil 
  • Salt/pepper to taste
  • 1 tsp paprika 
  • 1 tsp onion powder 
  • 1 tsp garlic powder 
  • 1 tsp thyme 
  • 1/2 tsp tumeric 
  • 1/4 tsp cayenne  (optional, this gives them heat – if you don’t like spicy foods don’t add the cayenne)

You will also need:
Large cast iron pan 
Stainless steel locking tongs (12 inches or bigger)

Instructions:
  1. Wash russet potatoes really well (use a veggie brush if you have one)
  2. Slice potatoes into 3/8 inch thick french fry pieces.
  3. Wash cut potatoes really well in cold water until water runs clear.  Then soak in fresh cold water for 15min.  **This step is what makes them crispy**
  4. While waiting, get your cast iron pan on the stove heating at medium heat and preheat the oven to 400 degrees.
  5. Drain potatoes 
  6. Put oil in pan (enough to have a thin layer of oil coating the entire pan) and turn heat up to medium high.
  7. Using large tongs toss potatoes in oil and arange in an even layer.
  8. Evenly sprinkle the herbs and spices over the potatoes.
  9. Carefully move the hot pan into the preheated oven and bake for 25min.
  10. Turn the oven to broil and let them crisp up on the top for another 15min.
  11. Let them cool slightly before diving in 🙂
*Note: I am a participant of the Amazon.com associates program.  This is an affiliate advertising program designed to provide a means for sites to earn advertising fees by advertising and linking to amazon.com.  I have personally purchased or researched all of the products linked and will not suggest a product otherwise.  By purchasing through these links you support this Mini Slice of Farm blog without any extra cost to you and allow us to continue posting great content for you.  Thank you for your support!!

Meatloaf chili leftover upgrade

We loooove leftover upgrade nights.  They are packed full of flavor and usually a delicious treat that technically took days to make but takes little to no effort.

From our “Bring dinner home again” post you know we do themed nights once a week.  A few nights ago we did an “Alice in Wonderland” themed dinner.  We had Queen of Hearts meatloaf, White Rabbit’s roasted carrots, and Card Soldiers salad.  Let me know in the comments or on our Facebook page if you would like a more detailed post about our Alice in Wonderland dinner menu!  

It was delicious, and we had enough meatloaf leftover to make chili!!  
Here is how.

Ingredients:

Instructions:

  1. Put dried beans in pot with one 4 cups water.  Bring to a boil then reduce the heat to simmer and cover for one hour. (you can do this the night before)  
  2. Toss the rest of the ingredients in the crock pot on low.
  3. when the beans are tender (after about on hour) drain and add them add them to the crock-pot.  
  4. Cook on low for 3-4 hours.  
  5. Ladle into bowls and garnish with sour cream, diced red onion, fresh cilantro, chives and/or cheddar cheese.  
*Note: I am a participant of the Amazon.com associates program.  This is an affiliate advertising program designed to provide a means for sites to earn advertising fees by advertising and linking to amazon.com.  I have personally purchased or researched all of the products linked and will not suggest a product otherwise.  By purchasing through these links you support this Mini Slice of Farm blog without any extra cost to you and allow us to continue posting great content for you.  Thank you for your support!! 

Creamy mushroom soup

So many of our favorite recipes call for cream of mushroom soup.  This is my version of this soup with an optional adult twist at the end …

Scroll down to the bottom for the instructional video.

*Note* you can make a double batch of this soup and freeze, or dehydrate it for use in other recipes.  Make sure to only use one cup of broth for the “condensed” version.  Freeze it in large ice cube trays for an easy grab option, every cube is 1oz.

Ingredients:

  • 3 Tbs olive oil
  • 1 medium onion sliced
  • 3 cups sliced mushrooms 
  • 3 Tbs butter
  • 3 Tbs flour
  • 2 cups broth or stock (for “condensed” soup only use 1 cup of broth, learn how to make your own here)
  • 1 cup milk
  • 1/2 tsp smoked paprika
  • 1 tsp garlic powder
  • 1 tsp Italian herbs 
  • 1/4 tsp cayenne pepper (optional, I add this for the health benefits)
  • 1/2 tsp turmeric (optional, I add this for the health benefits)
  • salt and pepper to taste
  • Your favorite dry red wine (Optional, I add this for the yum benefits)

Instructions:

  1. In a warm pot on med-high heat, saute the onion with a pinch of salt and pepper in olive oil until translucent.
  2. Add mushrooms with another pinch of salt and pepper (we are layering in the flavors, adding a small amount of salt and pepper with every ingredient builds depth of flavor)
  3. When the mushrooms release their juices sprinkle in the herbs and spices.  The mushrooms will absorb the juices with the herbs and spices.  
  4. When the mushrooms have reabsorbed the juices make a well in the middle of the pot and add the butter and flour.
  5. Whisk the butter and flour together until its well incorporated then whisk in one cup of the broth.  
  6. When its well incorporated stir in the last cup of broth.  Bring up to a boil while stirring continuously. 
  7. Add milk and bring back up to a slow simmer.  Reduce heat to medium and stir until the desired consistency is reached (it will thicken the longer it simmers).
  8. Taste for seasoning (Careful it’s HOT). Add if needed.
  9. Ladle the soup into your favorite bowl and drizzle with a little red wine.

Always a delicious potluck hit … Cucumber tomato salad??

**To Pin this for later use the “Pin it” button at the end of the instruction section**

Subscribe to our YouTube channel and follow us on social media!! 

 https://www.youtube.com/channel/UCvWq9EZRYx6MB6ty5m44c5w                                      


“Wow this is delicious, can I drink the juice?”

A few years ago we had a potluck get-together.  I wanted to bring a healthy option that everyone would actually eat.  I thought my FAVORITE side dish, mom’s cucumber tomato salad, would be perfect!  She made this salad next to a traditional recipe that came from my great grandmother that I like to call “flip over rice lasagna” (recipe coming soon).  

The reactions we received on the potluck side dish were very surprising.  Everyone initially went through the line and took a small spoonful to try (partly because they felt like they should have SOMETHING healthy on that plate lol).  After the first taste the comments were:

“Wait, what did you say was in this?” 
“Wow, this is delicious, can I drink the juice”
“Can I take the rest?”  


This salad is now the most requested side dish (and recipe) for us to bring to events.  
Hope you love it as much as we do 🙂 

Ingredients:

Instructions:

  1. Dice the cucumber, tomatoes and onion into 1/4 inch pieces and put into a large bowl.
  2. Lightly drizzle the olive oil, vinegar, and lemon all over the top.  Make sure to evenly distribute it all over the veggies.
  3. Evenly sprinkle the salt all over the veggies and wet ingredients.  
  4. Toss to incorporate all the ingredients together.
  5. Taste for added salt if needed – season to taste.
  6. Enjoy!
https://www.pinterest.com/pin/7881368076364751/
^^To pin this recipe for later click here^^

*Note: I am a participant of the Amazon.com associates program.  This is an affiliate advertising program designed to provide a means for sites to earn advertising fees by advertising and linking to amazon.com.  I have personally purchased or researched all of the products linked and will not suggest a product otherwise.  By purchasing through these links you support this Mini Slice of Farm blog without any extra cost to you and allow us to continue posting great content for you.  Thank you for your support!!

Lentil soup and financial security

In early 1990 my father decided to open his own business.  It was a small grocery store with a two bedroom apartment on top for us to live in.  I didn’t know it back then but our average income was about $400/month.  When I found that out as an adult I was blown away!!  How could a family of 4 survive on so little?!?!  And how did I not know??  Our table was always full of nutritious food.  We always had nice warm clothes and a spotless house.  We didn’t want for anything … it just didn’t make sense how we could have so much on so little.


Then I really thought about it.  Mom was a grocery shopping, coupon clipping, bargain finding queen.  Standing at the register with her as a little girl I remember she always paid in cash.  She shopped for fresh seasonal ingredients and supplemented lentils and beans for protein a few times a week.  She bought whole chickens and showed me how to break them down to the more expensively packaged “boneless skinless” pieces, how to use every part of the chicken for stock/broth, and how that can make several meals.  She always cooked and never let a drop go to waste.  She would do leftover upgrades and leftover buffets often.  

Lentil soup was a big staple in my childhood and as an adult it brings back great comfort on cold winter days.  It tastes extra special knowing it was one of the many meals that helped build a strong financial foundation for our family.  The recipe below will yield about 10 servings for less than $0.77/serving!!   

Here is my mamma’s yummy Lentil soup recipe… Enjoy 🙂


Ingredients:

  • 2 & 1/2 cup red lintels 
  • 1 medium onion chopped
  • 2 large carrots shredded 
  • 3 Tbls olive oil
  • 1 Tsp cumin 
  • 1/4 Tsp cayenne pepper
  • 6 & 1/2 cups of water (or broth … learn how to make it here)
  • About 1 & 1/2 teaspoon salt (to taste)
  • Sumac (optional) 

Instructions:

  1. Rinse lintels with water and drain (at least twice). 
  2. Sauté onion and carrots in olive oil on med-low heat until translucent (not caramelized, about 3-5min).
  3. Stir in lintels and cumin and stir around to bring out the flavors for about 3 min.
  4. Add the water, and cayenne pepper then cook over medium heat for 30 min.
  5. Add the salt to taste (and more water if its too thick) then cook for another 5min.  
  6. The soup will be ready to eat at this point.  
  7. To make it creamy, a recommended (but optional) step is to purée with an Hand Blender.
  8. To serve, ladle into bowls (optional – sprinkle a little sumac on top for extra flavor)
*Note: I am a participant of the Amazon.com associates program.  This is an affiliate advertising program designed to provide a means for sites to earn advertising fees by advertising and linking to amazon.com.  I have personally purchased or researched all of the products linked and will not suggest a product otherwise.  By purchasing through these links you support this Mini Slice of Farm blog without any extra cost to you and allow us to continue posting great content for you.  Thank you for your support!!

How to make butter in less than 60 seconds

We had a little fun on our snow day yesterday and made some butter.  Here is how we did it 🙂


Ingredients:

  • Heavy whipping cream (you can make this with as little or as much as you like as long as the whisk can reach the cream to whip it)
  • Mixer

Instructions:

  1. Pour heavy cream into mixing bowl.
  2. Slowly bring the mixer to high speed (so it doesn’t splash everywhere)
  3. Let it go until the butter separates from the buttermilk (it will splatter, see video)
  4. Press out the liquid and drain.
  5. Rinse butter with sold water until water is clear.
  6. Press into a butterbell or container of your choice.


*Note: I am a participant of the Amazon.com associates program.  This is an affiliate advertising program designed to provide a means for sites to earn advertising fees by advertising and linking to amazon.com.  I have personally purchased or researched all of the products linked and will not suggest a product otherwise.  By purchasing through these links you support this Mini Slice of Farm blog without any extra cost to you and allow us to continue posting great content for you.  Thank you for your support!!


Homegrown Turkey Meatballs

Our free ranged turkeys did really well this year.  They were very low maintenance, and lived off the pasture so didn’t cost us much to maintain.  They also gave us lots of fresh meat …

… here is one of the ways we used the meat for appetizers, Meatballs with a gravy dipping sauce.  These will work in a tomato sauce over pasta as a main course too!  Enjoy 🙂


Ingredients:
2 lbs ground turkey
1/2 medium sweet onion
5 cloves garlic
3/4 cup Italian bread crumbs
1 egg
1 TBS dry sage (or 2 TBS fresh)
1 tsp fresh rosemary
1 tsp fresh thyme
1 tsp salt
1 tsp pepper

Instructions:
Mince the onion and garlic (I run them through the grinder with the turkey).
Finely chop the sage, rosemary and thyme.

Combine all ingredients in a bowl and mix with hands until well incorporated.

Preheat cast iron skillet to 350 degrees. 
Add a small amount of oil to the pan, just enough to coat the bottom. 
Form 1 to 1-1/4 inch meatballs lightly packed and place in hot skillet (don’t overcrowd). 
Cook for about 2 minutes, or until browned and turn over to brown other side. 
Move browned meatballs to a baking dish and finish in a 350 degree oven for 25-30 minutes or until cooked through (165 degrees internal). 


To serve as appetizers add a dipping gravy (recipe can be found here).    


*Note: I am a participant of the Amazon.com associates program.  This is an affiliate advertising program designed to provide a means for sites to earn advertising fees by advertising and linking to amazon.com.  I have personally purchased or researched all of the products linked and will not suggest a product otherwise.  By purchasing through these links you support this Mini Slice of Farm blog without any extra cost to you and allow us to continue posting great content for you.  Thank you for your support!!