Rabbit loin (backstrap) Nuggets

**To Pin this recipe for later use the “Pin it” button at the end of the instruction section**

If you are following our menu this week (click here to see it) you’ll know I added a bonus lunch recipe to share this week … Bunny Nuggets.

We raise Flemish Giants and usually use the backstrap portion (the most tender part) to make grilled or fried nuggets.  If your farm rabbits are smaller than a flemish giant you can make this recipe using the leg meat.

Here is the recipe!

Ingredients:

  • Rabbit loin (aka backstrap)
  • 1 1/2 Cups flour
  • 1 large egg
  • 2 Tbs half n half or milk
  • 1/2 Cup Panko or breadcrumbs (optional, can use additional 1/2 cup flour)
  • 1 1/2 tsp smoked paprika
  • 2 tsp garlic powder
  • salt/pepper (to taste)
  • Frying oil (you can also do these in the air fryer if you have one)

Instructions:

  1. Cut up the loin pieces into 1/2 inch rounds
  2. Season one side with salt and pepper to taste, 3/4 tsp paprika, 1 tsp garlic powder.
  3. Flip pieces over and season the second side with salt/pepper to taste and the remaining spices.
  4. put the flour into a medium size bowl with high sides
  5. Toss the seasoned nuggets in there one at a time shaking the bowl to coat them, then place them back on the cutting board.
  6. Mix egg and milk in a small sized bowl
  7. Add 1/2 cup of panko or breadcrumbs to flour in medium sized bowl.
  8. Coat each nugget in the egg mixture then toss into the flour mixture and put back on the cutting board.
  9. When completely done heat up your oil to 375F or get the air fryer ready.
    1. For deep frying, fry for 5-7min or until they float and are golden brown, then drain on flour sack towel.
    2. For air fryer, lightly spray basket with oil and put nuggets in single layer, spray nuggets and cook for 15min.
  10. Allow to cool before diving in, they will be HOT!
*Note: You can do steps 1-8 ahead of time and keep in the refrigerator for a few hours until ready to fry.
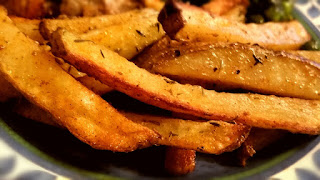
^^If you are looking for a good side to these nuggets, try this crispy oven baked fries recipe^^
^^To pin this Rabbit Nugget recipe for later click here^^

*Note: I am a participant of the Amazon.com associates program.  This is an affiliate advertising program designed to provide a means for sites to earn advertising fees by advertising and linking to amazon.com.  I have personally purchased or researched all of the products linked and will not suggest a product otherwise.  By purchasing through these links you support this Mini Slice of Farm blog without any extra cost to you and allow us to continue posting great content for you.  Thank you for your support!! 

Weekly Menu plan for Nov 27th through Dec 3rd

**To Pin this menu plan for later use the “Pin it” button at the end of the instruction section**

My husband surprised me with a fun gift on black Friday (he might have heard me talking about these once or twice haha).  An electric canner and pressure cooker.  I’m excited to try it in this weeks menu!
Coming up this Week (Nov 20th-26th):
  • Sunday, Green bean and tomato meat sauce with rice in the pressure cooker.
  • Monday, Stuffed Manicotti
  • Tuesday, BBQ Pulled rabbit sandwiches using the pressure cooker with homemade chips
  • Wednesday, Make your own pizza bar
  • Thursday, Shrimp scampi with broccoli
  • Friday, Leftover buffet and Family Movie Fun Night
  • Saturday, Corn chowder with side salad
Bonus:  I’ll be making Bunny Nuggets for lunch this week so I’ll post the recipe for those too 🙂  *Edit* It is now posted, click here for the Bunny Nuggets recipe.
^^To Pin this week’s menu click here^^
*Note: I am a participant of the Amazon.com associates program.  This is an affiliate advertising program designed to provide a means for sites to earn advertising fees by advertising and linking to amazon.com.  I have personally purchased or researched all of the products linked and will not suggest a product otherwise.  By purchasing through these links you support this Mini Slice of Farm blog without any extra cost to you and allow us to continue posting great content for you.  Thank you for your support!! 

Garlic and herb roasted turkey drumsticks with roasted veggies

**To Pin this recipe for later use the “Pin it” button at the end of the instruction section**

If you followed our meal plan last week (click here to see it) you know that we are using one of our farm fresh turkeys for a total of 8 completely different meals in 2 weeks.  I can generally use one turkey for 6-8 full meals.

I have prepared these many times in 2 different ways.  In the crock pot (this is the one I use) or in a roasting pan (this is the one I use for the drumsticks).  Both sets of instructions are listed below 🙂  Enjoy!!

Ingredients:

  • Two turkey drumsticks
  • 8 medium red potatoes (halved)
  • 4 Large carrots (peeled and cut into 2″ long pieces)
  • 4 Large celery stalks (cut into 2″ long pieces)
  • 1 Medium onion (peeled and cut into 4 half moon pieces)
  • 4 Large garlic cloves (peeled)
  • Garlic and herb spice mix (see below)
  • 4 Tbs Olive oil
  • 1/2-1 cup of water

Garlic and herb spice mix:

  • 2 Tbs Smoked paprika
  • 1 Tbs Turmeric
  • 1 Tbs Garlic powder
  • 1 Tbs Onion powder
  • 1 Tbs Thyme
  • 1 tsp Allspice
  • 2 tsp Freshly ground black peeper
  • 1 1/2 Tbs Salt + more to taste if needed

Crock pot instructions:

  1. You can do this recipe in a crock pot or in the oven (if doing this in the oven look for the oven instructions below).
  2. Pour 1/2 cup of water into the bottom of your crock pot.
  3. Add the turkey drumsticks and evenly sprinkle 1/3 of the garlic and herb seasoning mix on them.
  4. Add all the veggies around and on top of the drumsticks.
  5. Evenly drizzle the olive oil onto the veggies and sprinkle the rest of the spice mix over the veggies.
  6. Cook on High for 6 hours in the crock pot.  (Do not lift the lid to “check on them” … it will increase the cooking time).

Oven instructions:

  1. Preheat oven to 380F.
  2. Pour 1 cup of water into the bottom of a small roasting pan.
  3. Add the turkey drumsticks and evenly sprinkle 1/3 of the garlic and herb seasoning mix on them.
  4. Add all the veggies around and on top of the drumsticks.
  5. Evenly drizzle the olive oil onto the veggies and sprinkle the rest of the spice mix over the veggies.
  6. Cover and roast at 380F for 75min.
^^To pin this recipe for later click here^^

*Note: I am a participant of the Amazon.com associates program.  This is an affiliate advertising program designed to provide a means for sites to earn advertising fees by advertising and linking to amazon.com.  I have personally purchased or researched all of the products linked and will not suggest a product otherwise.  By purchasing through these links you support this Mini Slice of Farm blog without any extra cost to you and allow us to continue posting great content for you.  Thank you for your support!! 

Weekly menu plan for Nov 20th through 26th, and a review of last week’s with recipes

**To Pin this menu plan for later use the “Pin it” button at the end of the instruction section**

Coming up this Week (Nov 20th-26th):
Review of last Week (Nov 13th-19th):
  • Sunday, Veggie turkey rice – this is a quick go to meal that is ready in less than 25min!!  Please let me know if you would like the recipe in the comments below 🙂
  • Tuesday, Homemade Chipotle bowls – So.Much.FOOD …. we were all so full and had lots of leftovers!  yummy beans and rice for the win 🙂  Pictured above is my bowl that included Guacamole (recipe here), corn salsa, pico de gallo, black beans and lettuce.  Farmer J and the kids added lemon cilantro rice, chipole turkey, sour cream and shredded cheese.
  • Thursday, Steak, cheese and mushroom sandwiches with homemade fries – We baked some fresh baguettes using natural yeast, then turned them into sandwiches with steak, sauteed onions/mushrooms, cheese, and homemade mayo.  *Edit*I got lots of questions about the pan pictured above.  Its actually an insert you put onto your cookie sheet.  You can find it here (affiliate)
  • Friday, Leftover buffet and FMFN – Family Movie Fun Night is our most favorite night of the week!!  We do leftover buffet, games and a movie picnic.  More info in the “Bring dinner home again” post click here to see it.
  • Saturday, Our first big family thanksgiving dinner of the season!
^^To pin this week’s menu plan and recipes click here^^

*Note: I am a participant of the Amazon.com associates program.  This is an affiliate advertising program designed to provide a means for sites to earn advertising fees by advertising and linking to amazon.com.  I have personally purchased or researched all of the products linked and will not suggest a product otherwise.  By purchasing through these links you support this Mini Slice of Farm blog without any extra cost to you and allow us to continue posting great content for you.  Thank you for your support!! 

Lemon Pepper Turkey on Angel Hair Pasta

**To Pin this recipe for later use the “Pin it” button at the end of the instruction section**


If you are following our meal plan this week (click here to see it) you know that we are using one of our farm fresh turkeys for three completely different meals this week.  I can generally use one turkey for 6-8 full meals.

Monday’s menu was Lemon Pepper Turkey on Angel Hair Pasta … it was DELICIOUS.  This full meal cost us $3.51 for about 10 servings since we used our homegrown turkey, but you can get really good deals on turkey this time of year that will make this meal around $0.41/serving.

Ingredients
  • 3 Tbls butter
  • 1 small onion sliced (~1/2 cup)
  • 8 oz sliced mushrooms
  • 1 lb diced turkey breast
  • 2 Tbls Lemon Pepper
  • 1 Tbls Italian seasoning
  • 2-3 cloves minced garlic
  • 1-1/2 cups white wine (I like a sweet Riesling or Piesporter)
  • 1 cup diced tomatoes (or whole small cherry tomatoes)
  • ½ cup heavy cream
  • Salt to taste
  • 1 lb angel hair pasta
Instructions:  
This sauce will come together in about the time it takes to boil your pasta, so start by getting your generously salted pasta water boiling then toss in the angel hair pasta J
  1. Melt butter over medium-high heat in a large skillet.
  2. Add onions, mushrooms and turkey and a pinch of salt.
  3. Cook for 4-5 minutes, stirring occasionally- you want to allow the turkey to brown nicely on all sides, but don’t burn the onions and mushrooms.
  4. Once browned, add lemon pepper, Italian seasoning and garlic, stir well and cook for another minute.
  5. Add the wine and deglaze (get all those good crusty bits of flavor that are stuck to the bottom of your skillet).
  6. Reduce the heat to medium low. Add the tomatoes and simmer for 2-3 minutes.
  7. Turn off heat, stir in the cream and salt to taste.
  8. Toss pasta in the sauce, adding a bit of the pasta water to loosen up the sauce enough to coat the pasta.
^^To pin this recipe click here^^
**Want another turkey recipe?  Try our Turkey Meatballs (click here for recipe), we use them as an appetizer with Gravy Dipping Sauce (click here for recipe) or in sauce over pasta 🙂

Weekly menu plan for Nov 13th through 19th, and a review of last week’s

**To Pin this menu plan for later use the “Pin it” button at the end of the instruction section**

We had a few hits and one major FAIL on last week’s menu.  For recipes and review look below.

Coming up this Week (Nov 13th-19th):

Sunday, Veggie turkey rice

Monday, Lemon pepper turkey breast on angel hair pasta
Tuesday, Homemade Chipotle bowls
Wednesday, Roasted turkey drumsticks and veggies
Thursday, Steak, cheese and mushroom sandwiches with homemade fries
Friday, Leftover buffet and FMFN
Saturday, Our first big family thanksgiving dinner of the season!
Review of last Week (Nov 6th-12th):
Sunday, Savory turnover rice casserole.  

*This was a big hit!!  I will be sharing this recipe on the blog soon.

Monday, Honey roasted Butternut Squash 


Honey roasted butternut squash, grilled tenderloin and thyme glazed peas.✔  

*This was another big hit!  For the honey roasted butternut squash recipe click here

Tuesday, Homemade Tacos. 


*Homemade Tacos are on our menu at least once every two weeks.  We make the tortillas, refried beans, salsa and guacamole from scratch.  Please let me know if you would like any of these recipes and I will post them for you!!  (If you would like Farmer J’s Guacamole Perfection recipe click here)


Thursday, Pineapple sage braised rabbit and veggies.  ❎ 
     We had such high hopes for this one!!! Unfortunately, it was just OK, but we will not be making it again.  Life is too short to waste time on just “OK” food lol 
Friday, Leftover buffet and FMFN.
Family Movie Fun Night is our most favorite night of the week!!  We do leftover buffet, games and a movie picnic.  More info in the “Bring dinner home again” post click here to see it.

^^To pin this week’s menu plan and recipes click here^^

Honey roasted butternut squash

**To Pin this recipe for later use the “Pin it” button at the end of the instruction section**

*For instructions on how to roast butternut squash for puree click here*

Ingredients:
Instructions:

  1. Place oven rack in the center of the oven and preheat oven to 450°.
  2. Toss diced butternut squash in olive oil and spread on a lined cookie sheet.
  3. Season lightly with salt and pepper.
  4. Bake for 10 minutes
  5. Mix brown sugar, cinnamon and cloves in a separate dish.
  6. Carefully pull squash out of the oven (use caution as it is very HOT) and coat it with honey and maple syrup.  Then sprinkle sugar and spice mix over the squash evenly.
  7. Place squash back in the oven for 15 minutes to bake.
  8. Switch your oven to broil.  Broil until golden brown (about 5 min).

Enjoy!

^^Click here to pin the honey roasted butternut squash recipe for later^^


*Note: I am a participant of the Amazon.com associates program.  This is an affiliate advertising program designed to provide a means for sites to earn advertising fees by advertising and linking to amazon.com.  I have personally purchased or researched all of the products linked and will not suggest a product otherwise.  By purchasing through these links you support this Mini Slice of Farm blog without any extra cost to you and allow us to continue posting great content for you.  Thank you for your support!!

Spaghetti squash noodle bowl with Italian meat sauce

**To Pin this recipe for later use the “Pin it” button at the end of the instruction section**

Subscribe to our YouTube channel and follow us on social media!! 

 https://www.youtube.com/channel/UCvWq9EZRYx6MB6ty5m44c5w                                      

Italian meat sauce ingredients:

  • 1 onion, diced
  • 1 lb ground meat
  • 3-4 cloves of garlic, minced
  • 2 tsp dried Italian seasoning
  • 1 tbs fresh chopped basil
  • 1 tsp fresh chopped thyme
  • 4-5 cups fresh tomato sauce
  • Salt and pepper to taste

Other ingredients to complete bowl:

How to prep Spaghetti Squash

Italian meat sauce instructions:

  1. In a large pot, saute onions in olive oil over med-high heat until translucent (5-7 minutes)
  2. Add garlic and ground meat and brown until meat is mostly cooked
  3. Stir in seasoning and herbs and add about 1 tsp salt and ½ tsp freshly ground black pepper
  4. Add tomato sauce and allow to come to a boil.
  5. Reduce heat and simmer until desired thickness then adjust for salt to taste.

Bowl assembly instructions:

  1. Place your prepared squash bowl on a plate.
  2. Ladle in a few cups of sauce
  3. Top off with Parmigiana reggiano and mozzarella

Enjoy!!!

^^Click here to pin this recipe for later^^

Preparing spaghetti squash

**To Pin this recipe for later use the “Pin it” button at the end of the instruction section**

Subscribe to our YouTube channel and follow us on social media!! 
 https://www.youtube.com/channel/UCvWq9EZRYx6MB6ty5m44c5w                                      

What you will need:
  • One large spaghetti squash
  • Sharp knife
  • Kitchen towel
  • Fork
Instructions:
  1. Wash and dry your spaghetti squash
  2. Place a Kitchen towel on your cutting board and put the squash on it (this is to prevent slipping)
  3. Hold the squash tight and carefully cut off the stem end
  4. Cut the squash length wise to make two oval “bowls” 
  5. Scoop out the seeds 
  6. Cook 1/2 squash in microwave for 7 min on high then carefully remove (use oven mitts or towel as it will be HOT).  *Note* You can also do both halves at the same time in the oven.  Put them face down in a glass baking dish with 1/2 inch of water and bake at 400 for 30min.
  7. Using a fork, start combing the “spaghetti” off the inner sides of the bowl until you reach the outside edge and have a full bowl of “noodles” as pictured below.

  8. Top with your favorite sauce (you can find my recipe here) and some yummy cheese to enjoy your spaghetti squash bowl 🙂

Garden Fresh Tomato Bisque

Subscribe to our YouTube channel and follow us on social media!! 
 https://www.youtube.com/channel/UCvWq9EZRYx6MB6ty5m44c5w                                      

This has been the month of soups, stews and comfort food!!!  Fall is just a great time to sit back with a warm bowl of comfort food.  After the Creamy Pot Pie Soup last week we went back to our childhood to the ultimate comfort soup meal Tomato bisque and grilled cheese on fresh baked bread!
I received soooo many requests for this tomato soup recipe so hope you love it as much as we do!!
**To Pin this recipe for later use the “Pin it” button at the end of the instruction section**

Ingredients:

  • 4 cups fresh chopped tomatoes
  • 1 large shallot or 1/2 mild onion chopped
  • 1 cup broth or water
  • 1/4 cup sherry (optional)
  • 3 fresh thyme sprigs
  • 6 fresh large (or equivalent small) basil leaves
  • 2 Tbls olive oil
  • 1 large clove garlic minced
  • 1/2 cup heavy cream
  • salt and pepper

Instructions:

  1. Heat olive oil over medium-high heat
  2. Add onions and pinch of salt and cook until translucent, 5-7 minutes
  3. Add garlic and whole herbs with another pinch of salt and toss for 1 min
  4. Deglaze with the sherry
  5. Add broth and tomatoes
  6. Simmer over medium heat until tomatoes are easily mashed
  7. Mash tomatoes thoroughly with a potato masher 
  8. Simmer another 5 minutes
  9. Press the soup through a fine sieve, stirring until all of the liquid is out of the pulp
  10. Stir in the cream
  11. Salt to taste and top with fresh cracked pepper


*Options:
Some like a higher broth/tomato ratio.
We’re using heirloom tomatoes and I like to let them shine,
but you could go up to 4 cups broth here. I would increase the herbs
if increasing broth.
If the soup is not hot enough after adding cream, you can return to
medium heat, but don’t bring to a boil or it might break.

 Pin the Garden Fresh Tomato Bisque recipe here