A lifetime supply of FREE yeast!! How to feed your yeast starter

My favorite part of making bread, gooey cinnamon rolls, or any other carbo-licious treat is seeing the yeast work to fluff up the dough.

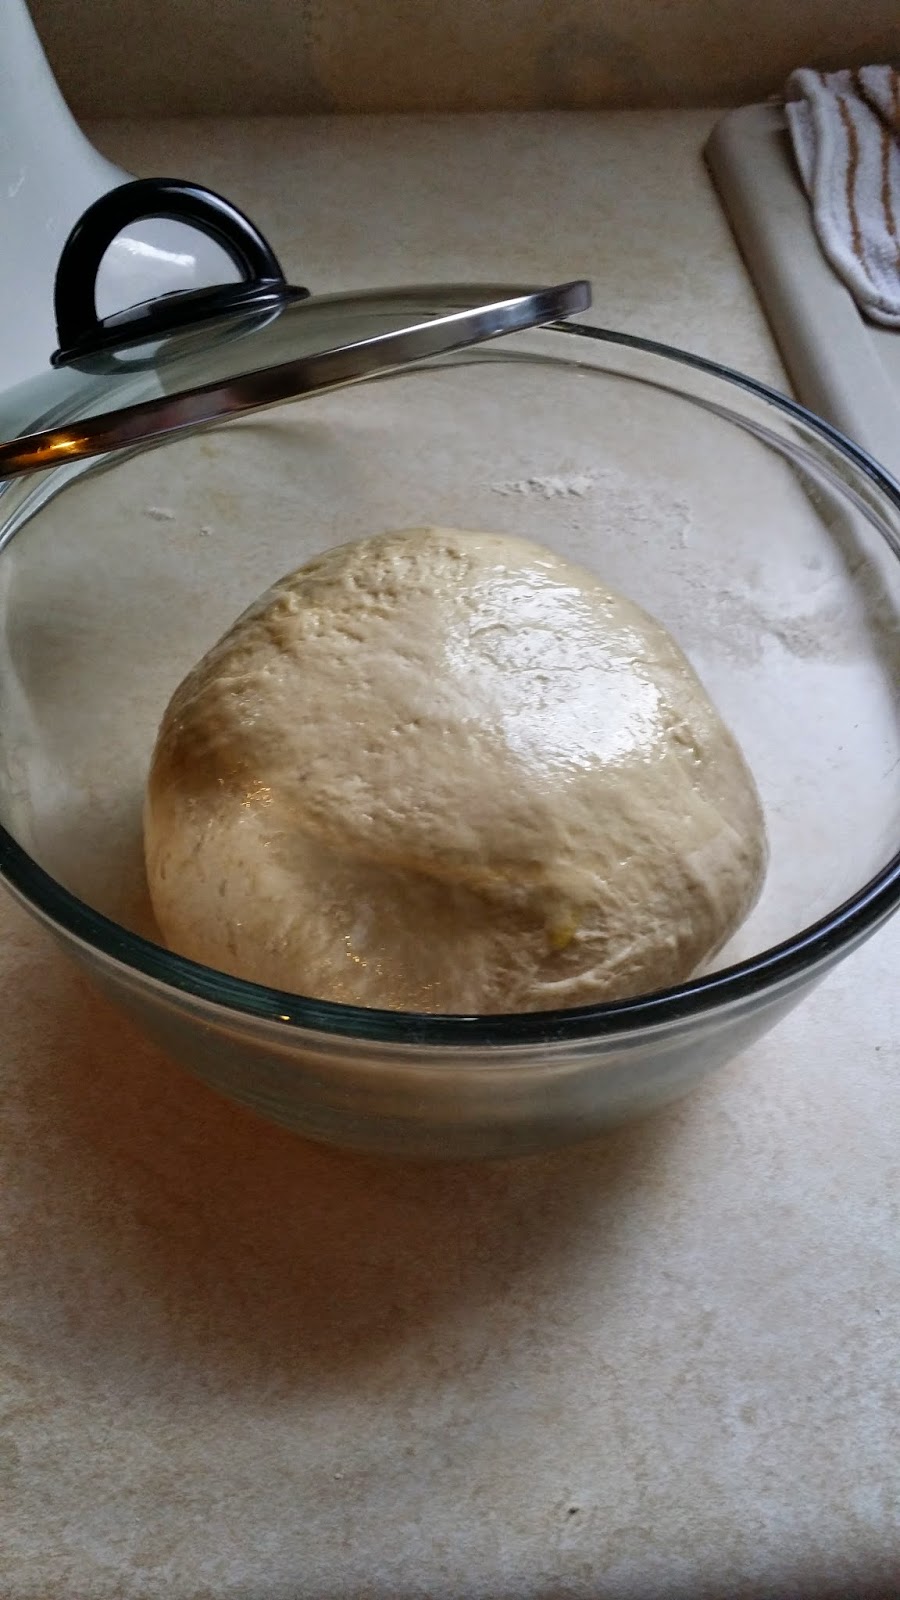
Bread dough before rising with natural yeast

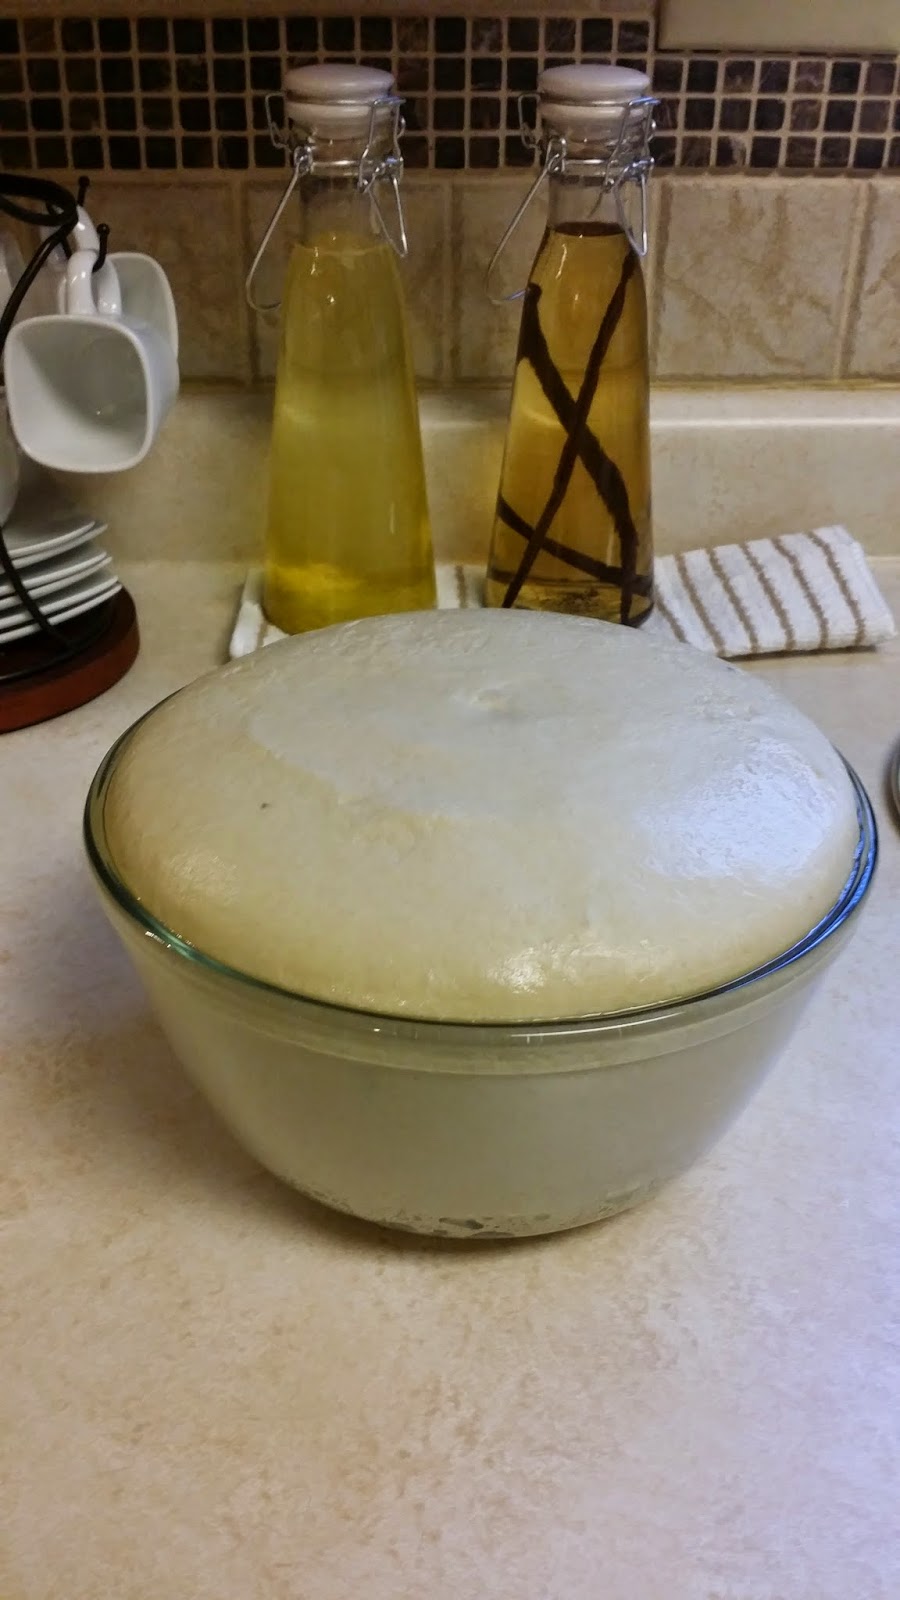
Bread dough after rising with natural yeast

Store bought (lab created) yeast is not good for you AND expensive!  A good natural yeast starter will last you generations … and it’s FREE.  (Click here if you need to start one from scratch)

As long as you feed your starter you will have free yeast.  If you keep your yeast starter in the refrigerator this will be every 2-3 days.  Here is how:

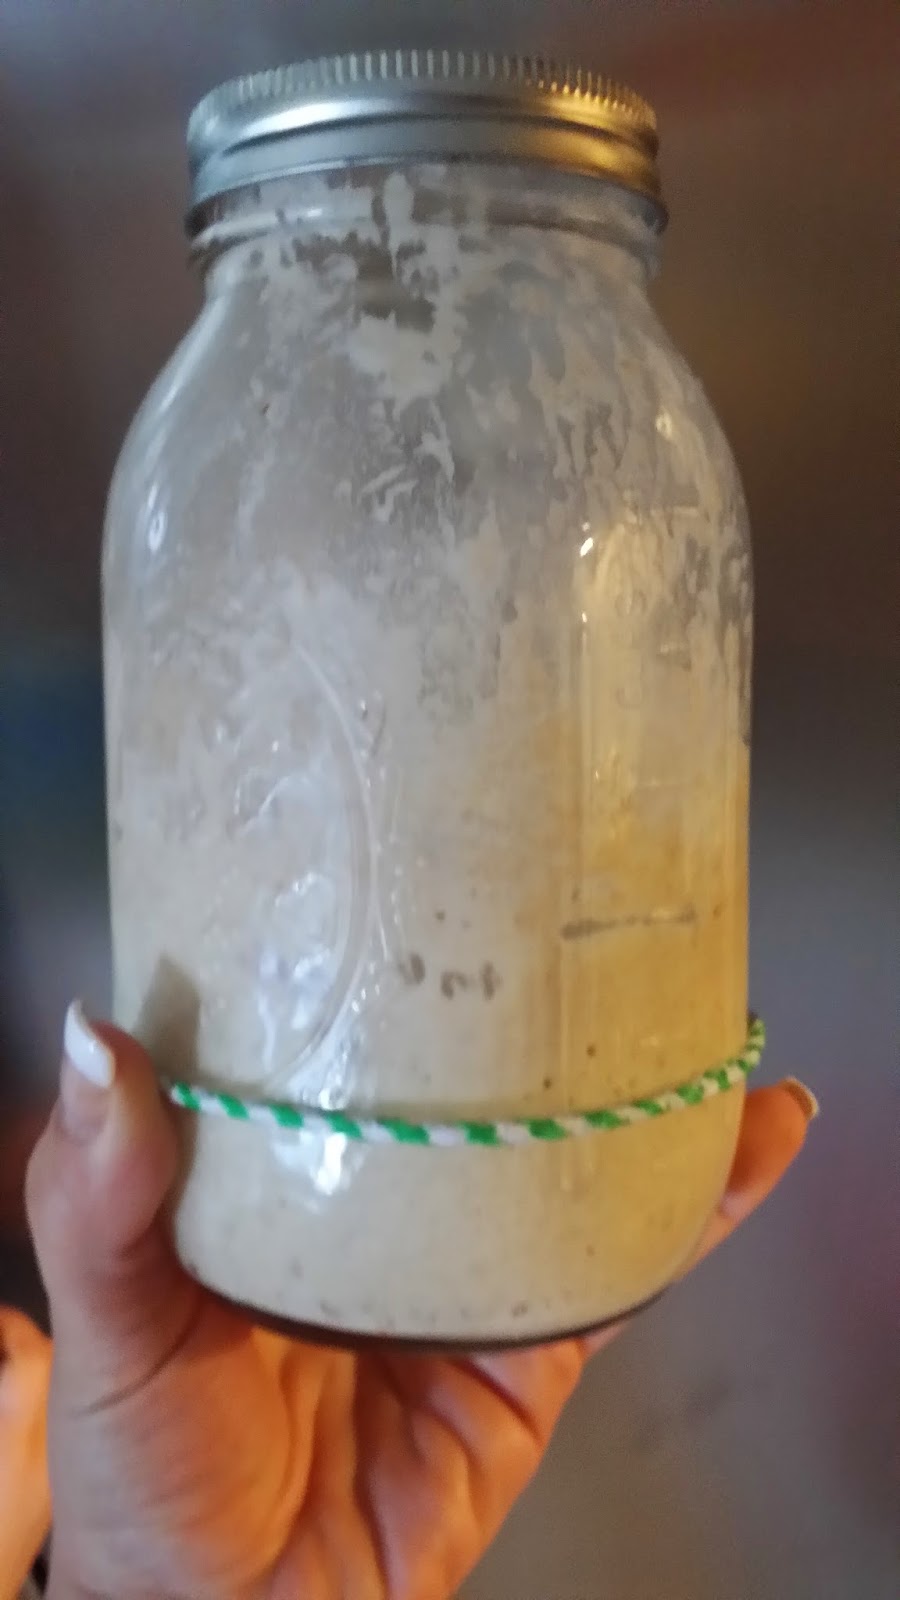
Once you pull out what you need for your recipe (1/2 cup for every 4-5 cups of flour) you will need to feed your starter.  It is an equal ratio of one part starter, one part filtered water, and one part flour.

I find it easier to put the starter in a measuring cup, then add an equal amount of filtered water and stir until combined.

Then pour the mixture back into the jar an add the flour.  Then stir to combine.   Move your market to mark where your starter is.   When it has bubbled and risen it is ready for use again.  When my yeast was running low I just feed it without using it for a recipe.

Here I had 1/4 cup of yeast left after I took out what I needed.  I added the 1/4 cup of water then poured it back into the jar.

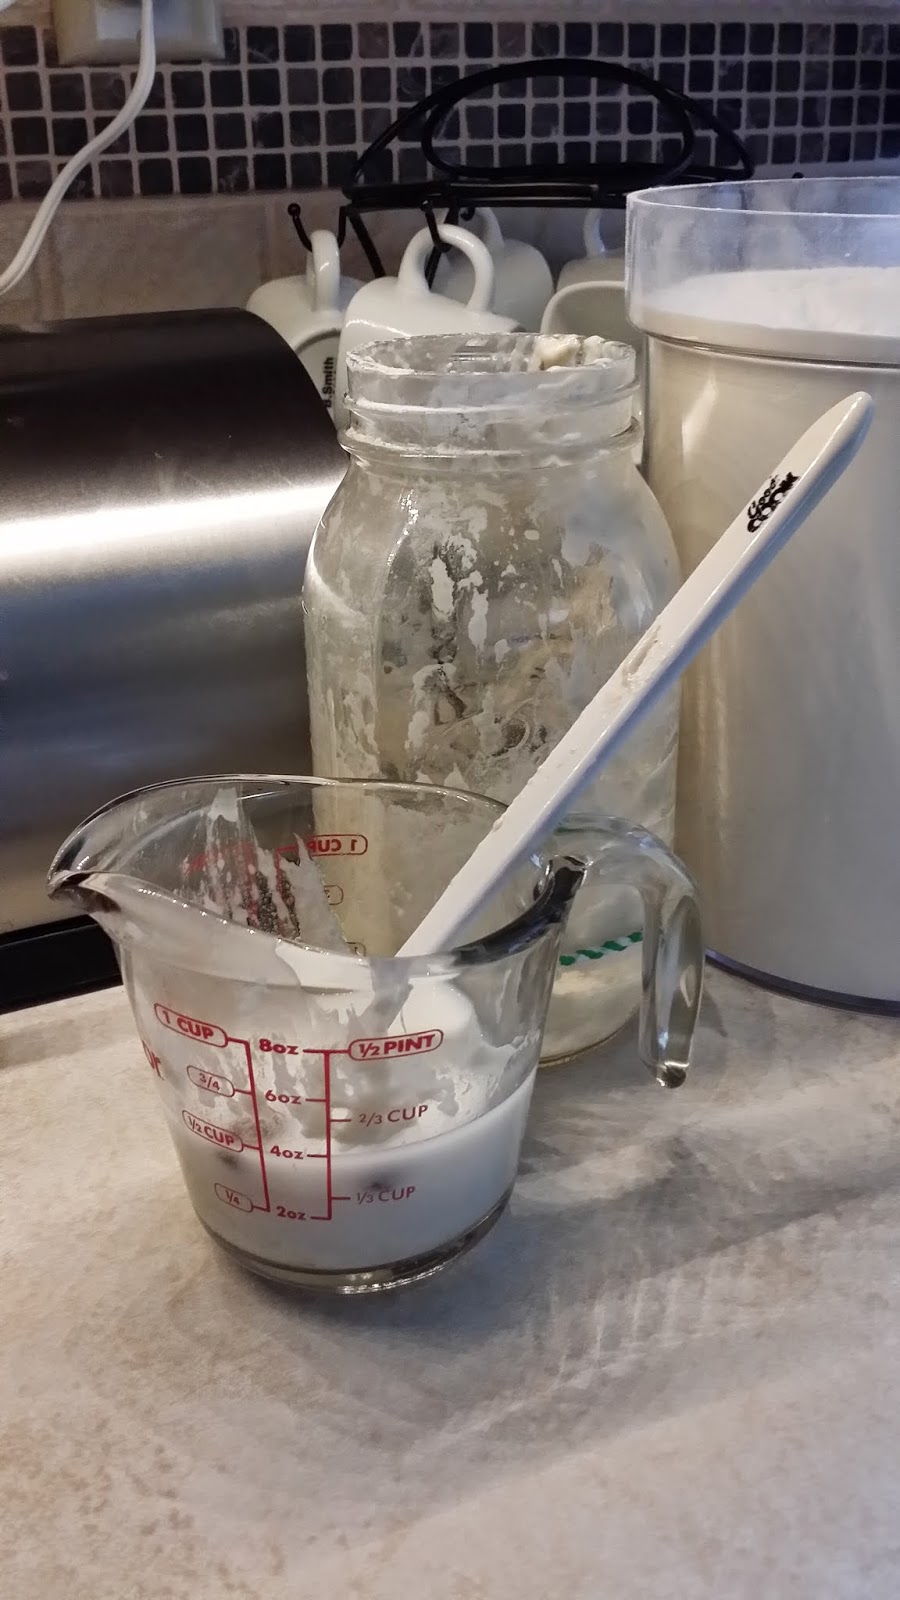
I then added a 1/4 cup of flour.   And remarked my jar.

A few days later when my yeast was ready to feed again I added 3/4 cup water, then 3/4 cup flour.  I moved half of the starter to a clean jar and gave it to a friend 🙂

How to make a SWEET yeast starter!!

After many MANY failures I finally have an active yeast starter that makes fluffy slightly sweet bread.  We started making our own bread a few years ago but have always purchased the yeast.  This yeast starter will make bread indefinitely as long as we keep feeding it!  (Some have been around since the 1800s!)

This starter was made by fermenting organic unsweetened raisins.  You will need THREE ingredients. Filtered water, flour, and organic unsweetened raisins …

Firmented raisin water:
â–Ş Mix 3 parts water to one part raisins in a mason jar for one day (at room temperature).
â–Ş Every morning open the lid, gently swirl the liquid and replace lid.
â–Ş Throughout the day shake the jar 2 more times with a lid on.
â–Ş After 6-7 days all the raisins will float to the top and you should hear the raisins and water mixture fizing (like a can of soda).

Yeast starter:
â–Ş In a clean mason jar stir 4 tablespoons of the fermented rasin water with 4 tablespoons of flour.
â–Ş When the mixture doubles in size stir in 8 tablespoons of filtered water and 8 tablespoon of flour.
â–Ş When the mixture doubles in size again you now have an active starter!!

To learn how to feed, use and store your yeast click HERE!

For the perfect natural yeast bread recipe click HERE!

An incredibly delicious gooey cinnamon roll recipe using natural yeast is posted HERE!

**3/1/2016 Update!!!**
I recently helped a reader work through her first starter too.  Here is the link, she has pictures of her process in the comments as we worked through it together 🙂

Hi there I was using your recipe for making my own bread starter and have a few questions. I’ve fermented the raisin…
Posted on Friday, February 26, 2016

Quick Refrigerator Pickle Recipe

Quick Refrigerator Pickle Recipe

I’ve gotten lots of requests for the refrigerator pickle recipe on the Facebook page (www.facebook.com/MiniSliceOfFarm)  … So here it is!  Enjoy!!

3/4 cup white vinegar
3/4 cup water
1/2 cup sugar (or honey)
1 teaspoons celery seed
1 teaspoon salt

4 medium sliced cucumber
1 small onion, thinly sliced

Place sliced cucumber, onions and celery seed in a large container. In a separate bowl, stir vinegar, sugar, water and salt together until dissolved. Pour liquid over cucumber and onions.  I put a small glass (like a shot glass) on the top to push the cucumbers and onions down before closing the lid.  Refrigerate for 5 to 7 days – lasts about 3 months.

It almost seems too easy doesn’t it? 🙂  Trust me those 5 to 7 days of waiting will be torture lol!!  But the longer you wait the yummier they get.

Chicken and mushrooms in fire roasted tomato sauce

Growing up we ate a lot of sauce over rice dishes.  I have many favorites but this one tops the list.  I now make a double batch and can half of it for a quick lunch or dinner option!

What you will need:

  • 1 large onion diced
  • 24 oz sliced mushrooms
  • 2 large green bell peppers diced
  • 2 large cloves of garlic grated (or finely diced)
  • 48 oz (3lbs) fire roasted diced tomatoes
  • One whole chicken cut up
  • 2 tsp each:
    • Italian herbs
    • dried thyme
    • garlic powder
    • onion powder
    • garlic powder
    • paprika
    • Salt and pepper to taste

Instructions:

  1. In a large heavy pot (I use a big dutch oven) saute the onion with a smsll pinch of salt and pepper on med/high until translucent.
  2. Add green bell peppers with another small pinch of salt and pepper and saute for another 5 minutes.
  3. Add mushrooms and greated garlic with another small pinch of salt and pepper until the water is released from the mushrooms and re absorbed (about 10min).
  4. Add chicken with salt and pepper.  Stir mixture around for 5 min then add all the rest of the herbs and spices.
  5. Add the tomatoes and 1/2 cup of water.  Stir the mixture to incorporate everything well. Bring to a bubble then reduce heat, cover the pot, and let simmer for 90 minutes stirring occasionally.
  6. Serve over a bed of white or brown rice.  photo I have of this recipe is after I canned a batch.  I will take some next time I make this dish and post them for your reference 🙂

Homemade cream cheese

A few days ago I shared my momma’s (slightly improved) homemade yogurt recipe.

When I make yogurt I usually do a full gallon because I can turn half of that yogurt into cream cheese by simply pouring it through cheesecloth!

Place a fine mesh colander in a large bowl and line it with a double layer of cheesecloth.  

Pour your yogurt into the cheesecloth and let the whey drip out for one hour undisturbed.

Then pull the sides of the cheesecloth up to form a pouch around the yogurt. Hang that pouch (I use a rubber band) above the bowl and allow to drip for another 24-48 hours.

After the cheese reaches the desired consistency, use a spatula to move it to a container and store it in the refrigerator.

You can also make this in a Greek yogurt mesh sieve, (pressing the cheese with the back of a spatula at the end while its still in the sieve will get it to the desired consistency)


We love it sweet or savory.  Our favorite way to eat it is on fresh bread under a layer of strawberry jam!

Enjoy!


*Note: I am a participant of the Amazon.com associates program.  This is an affiliate advertising program designed to provide a means for sites to earn advertising fees by advertising and linking to amazon.com.  I have personally purchased or researched all of the products linked and will not suggest a product otherwise.  By purchasing through these links you support this Mini Slice of Farm blog without any extra cost to you and allow us to continue posting great content for you.  Thank you for your support!! 

How I save over $110/Month on baby food

Oganic non GMO is very important to us as a family.   Since we still don’t have proper GMO labeling and most of the “organic” babyfood had some “natural” preservative or additive we had to come up with an alternative way to feed our precious boy.

When it came time to start feeding our baby solid foods we came up with some delicious, homemade and easy recipes.  I was shocked how much it saved us when I calculated the savings!!

Here is an easy (and incredibly yummy) one to start with.

Roasted butternut squash puree

1 – Preheat oven to 400°F
2 – Wash and cut butternut squash lengthwise
3 – Scoop out seeds using a spoon (save those for later – more on that in a future post)

4 – Place squash cut side down in baking dish with 1″ water
5 – Roast at 400°F for 40 min
6 – Let cool until it’s not too hot to touch and start peeling.  I pull off the peel with my fingers but you can also turn the squash and scoop out with a large spoon.
7 – Puree in a food processor or blender.

And that’s it!  My 1.5lb squash gave me 32oz of baby food.  If I were to buy this in the prepackaged jars I would pay $0.30/oz.  That is $9.60 for 32oz.  I payed $2.20 for the squash, a savings of $7.40.  My baby eats 32oz of food in 2 days.  So that is a savings of $111/mo!!  Not bad for 10min of actual work!  AND it was much yummier than anything prepackaged in a jar … I had to hold myself back from eating it all 🙂

My Momma’s (slightly improved) homemade yogurt

Recently I posted a picture of milk on my Facebook page with a comment that I’ll be making yogurt later (among other things  … it was three gallons!).  A few people asked me for the recipe – so here it is!  My Momma’s (slightly improved) yogurt recipe 🙂 

We have had homemade yogurt in the refrigerator for as long as I can remember.  Both my grandmothers used to make it, and my mom made a batch every weekend.  So now I make it – although I’ve slightly adapted the technique my mother and grandmothers used (it seemed slightly barbaric … you’ll see what I mean in a bit).  
 So here is my version of momma’s yogurt recipe.  I’ll leave her notes in the parentheses.
What you will need:
Milk (Whole, or 2%) ……………………………………….. 1 Quart
Yogurt (either homemade or store bought) ……. 1/2 Cup
1 – In a stainless steel pot bring milk up to 180oF (if using raw milk for raw yogurt only heat to 120°F and skip step 2) on medium heat stirring constantly to avoid scorching the milk (Mom didn’t have a temp – “heat the milk until its hot but not boiling – it will start to get foamy.  Don’t walk away because it will burn and ruin the flavor of your yogurt”)
2 – Remove from heat and let cool to 120oF.  (Again, mom didn’t have a temp “let it cool down a little bit.  Stick your finger in the milk, if it’s too hot then it will kill the yogurt culture so you have to wati a little longer.  When you can stick your finger in there without it burning, the milk is ready for the yogurt.”)
3 – Take one cup of the 120oF milk and mix it with the yogurt starter.  Then pour the mixture into the pot and combine with the rest of the milk.
4 – Pour the mixture into glass jars, cover with a lid, and wrap with towels and a blanket.  The goal here is to keep the yogurt at 120 so the culture will turn your milk to yogurt. 
**Important note**:  DO NOT MOVE OR DISTURB YOUR YOGURT FOR AT LEAST 6 HRs.  This process works best for me if I keep it in the oven with the light turned on.  It maintains the proper temperature and no one touches it.  I also do this at night and the yogurt is ready by the morning.
5 – Carefully pull off the blanket and refrigerate.  Enjoy your yummy yogurt!!

*Note: I am a participant of the Amazon.com associates program.  This is an affiliate advertising program designed to provide a means for sites to earn advertising fees by advertising and linking to amazon.com.  I have personally purchased or researched all of the products linked and will not suggest a product otherwise.  By purchasing through these links you support this Mini Slice of Farm blog without any extra cost to you and allow us to continue posting great content for you.  Thank you for your support!!